How to check image EXIF with plain JavaScript.
It's not a secret that JavaScript can be very used for pretty much everything, from calculating simple math to reading binary data and to generating 3D models. In this example we'll see how to read EXIF data of an image. That is, from JPEG, PNG, TIFF, HEIC/HEIF and WEBP.
Preparing the document
Let's start by including some basic HTML to the document, like Tailwindcss for CSS components, and the ExifReader library to actually read the EXIF. Don't forget to also create our script file main.js where we will bind some basic events and do all the processing. Please note, I'm not building my main script, nor creating a project with packages.json, just because that's and overkill for this example.
<!doctype html>
<html>
<head>
  <meta charset="UTF-8">
  <meta name="viewport" content="width=device-width, initial-scale=1.0">
  <script src="https://cdn.tailwindcss.com"></script>
  <script src="https://cdn.jsdelivr.net/npm/exifreader"></script>
  <script src="main.js"></script>
</head>
Next up, we'll create our basic template. What we will need is a box where we drop the files, as well as provide a fallback to <input type="file" />. After that, we need any basic container to render the results. So I came up with something like this:
<body class="antialiased text-slate-500 bg-slate-100">
  <div class="container mx-auto">
    <div class="flex items-center justify-center p-8">
      <label id="drop" class="block cursor-pointer max-w-md mx-auto bg-white rounded-lg shadow-xl overflow-hidden sm:max-w-2xl ring-1 ring-slate-900/5 transition group hover:ring-slate-400 hover:text-slate-700 hover:shadow-md">
        <span class="block border border-slate-200 border-2 border-dashed rounded-lg m-2 transition group-hover:border-slate-400">
          <span class="block px-16 py-12">
            <span>Drop the files here</span>
            <input type="file" name="file_upload" class="hidden" />
          </span>
        </span>
      </label>
    </div>
    <div id="results" class="text-left text-slate-600"></div>
  </div>
</body>
You will notice the label with id="drop". This is essentially the element where we will bind all the events, provide some hover effects etc. etc.
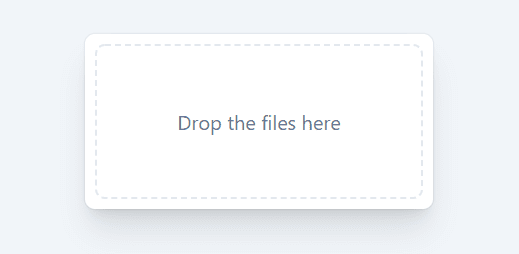
You should get a box that looks more less like this:

Now, since drop events cannot really be styled, we need to add a new Tailwind class that will modify our drop box. For this, we need to add a special @layer directive:
<style type="text/tailwindcss">
  @layer utilities {
    .dropping {
      @apply bg-blue-100 shadow-md ring-slate-300;
    }
  }
</style>
The actual script
Now let's create our main.js file that will handle all the events. We will need to handle 4 events for the drop area, and 1 event for the <input> fallback. Sounds easy enough.
window.addEventListener('DOMContentLoaded', () => {
  const area = document.getElementById('drop')
  const input = area.querySelector('input')

  const onDrop = function(e) {
    e.preventDefault();
    e.stopPropagation();
    area.classList.remove('dropping');
    processFiles(e.dataTransfer.files);
  }

  const onDrag = function(e) {
    e.preventDefault();
    e.stopPropagation();
    area.classList.add('dropping');
  }

  const onLeave = function(e) {
    e.preventDefault();
    e.stopPropagation();
    area.classList.remove('dropping');
  }


  const onSelect = function(e) {
    processFiles(e.target.files);
  }

  area.addEventListener('dragenter', onDrag, false)
  area.addEventListener('dragover', onDrag, false)
  area.addEventListener('dragleave', onLeave, false)
  area.addEventListener('drop', onDrop, false)
  input.addEventListener('change', onSelect, false)
});
Dragenter and dragover are triggered when your drag a file over the drop box. We are also adding the "dropping" class to the drop box on these events.Dragleave is the one that runs when you drag the file out of the box. We are removing the "dropping" class from the drop box on this event.Drop is triggered when you release the files on the box.
And then we have our fallback input that we need process during change event.
Processing actual files
Now let's add our processFiles function. It just needs to traverse over the list of Files, run the EXIF lib against each of those and dump the results into the #result container. The ExifReader library accepts one of the options:
- File object, the result of a form file upload (browser)
- File path on a local file system (Node.js)
- URL (browser or Node.js; remember that in a browser context the remote server has to set CORS headers that allow for remote loading of the file)
- ArrayBuffer or SharedArrayBuffer
- Buffer (Node.js)
We will use the first option, as that is exactly what browser gives us when the drop or change events are triggered. Let's also remember that loading EXIF data is an asynchronous operation, so to make our life easier we can make our processFiles function asynchronous too ;)
const results = document.getElementById('results')
const div = function(text) {
const elem = document.createElement('div');
elem.innerHTML = text;
results.appendChild(elem);
}
const processFiles = async function(files) {
if (files && files.length) {
results.innerHTML = ''; // remove old results
for (let file of files) {
div(`<strong>${file.name}</strong>`);
let exif = null;
try {
exif = await ExifReader.load(file);
} catch(e) {
div(`<span class="text-red-700">${e.message}</span>`);
}
if (exif) {
for (let tag in exif) {
div(`${tag}: ${exif[tag].value} - ${exif[tag].description}`);
}
} else {
div(`No results`);
}
div(` `);
}
}
}And that's all that we need. Here's essentially what happens:
- Clear the previous results
- Output the current file name
- Load the Exif. If it fails - display the error.
- If there's Exif data - iterate through each value.
- If there's no Exif data - tell that.
Things to consider
processFilesis a Promise now, so you are responsible for catching the errors.- You might want to immediately stop processing if the file mime type is not an image. (looks like ExifReader also does that, so it's up to you)
- Code is not transpiled for older browsers. It's up to you to decide what you are doing with it.
- Code is not modular. Meaning, you can't have multiple instances of it on a page, nor it's importable from other source files. Some work has to be done here ;)
Download the source code (html + js) below
[wpdm_package id='265']Resources to read
Drag and drop API: https://developer.mozilla.org/en-US/docs/Web/API/HTML_Drag_and_Drop_API
Web API -> File https://developer.mozilla.org/en-US/docs/Web/API/File
ExifReader library -> https://github.com/mattiasw/ExifReader
TailwindCSS - https://tailwindcss.com/